How to Create Signatures with Images
Creating a Signature
Creating a Signature with Images
Creating a Signature
You may want to create a signature so that people can easily identify mails from you and to include useful details such as your telephone number.
From within Outlook:
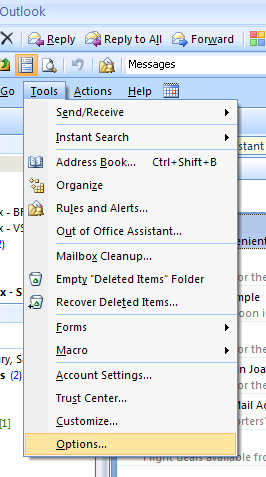
Click on Tools.
Click on Options.
Click on the Mail Format Tab.

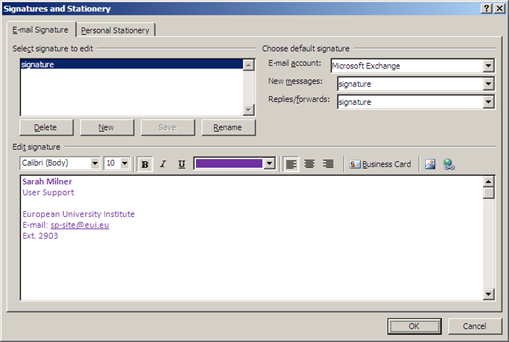
Click on Signatures.
Click New.
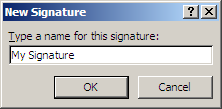
Then give the new signature an appropriate name and press OK.
With your new Signature selected in the top box, create your signature in the lower section.
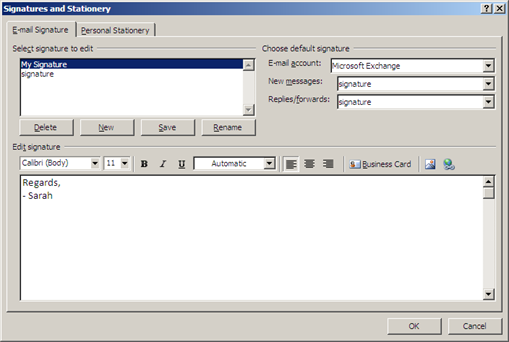
To make the new signature appear automatically in new e-mails, select the name of the signature in the ‘New messages’ box, before pressing OK to finish.

Creating a Signature with Images
You may want to make more impact by placing an image within the signature.
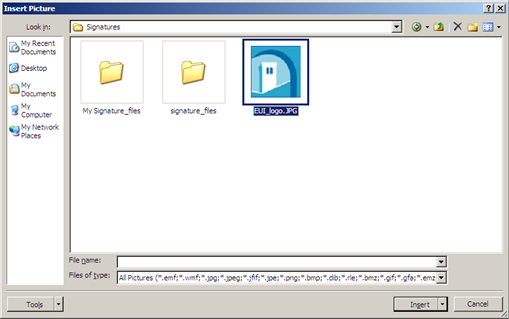
You should first save the image you wish to use in G:\Application Data\Microsoft\Signatures\ - this is where your signatures are stored.
After following the steps above for creating a signature:
From within the signature menu, click on the Images icon (circled in red below).

Then locate the image you saved in the Signatures folder and click OK.
You should then see the image in your signature. Click OK to apply.

Page last updated on 17 August 2017