EUI-Guest Configuration for MS Windows 7
The below guide has been tested on Windows 7 Professional and is based on Windows' default wireless configuration tool (Wireless Zero Configuration).
Screenshots are taken from Professional version thus may slightly differ from other versions (e.g. Home Premium, etc.).
- Proper drivers for your wireless network card must already be installed. Windows 7 has a huge list of built-in drivers but if there is none suitable for your card, you should refer to your card vendor's Web site and download the proper one. Advice on installing and setting up your network card can be provided by Portable Device Support.
- Your network card must be enabled and turned on (depending on the make, either via hardware or software switch).
-
-
Click on the
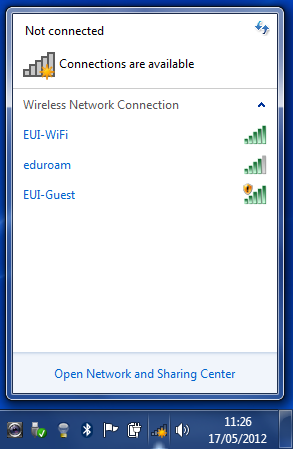
Wireless Connection icon in the tray bar (usually bottom right corner) of the desktop: a list of available WiFi networks will show up:

Figure 1: Available WiFi networks
-
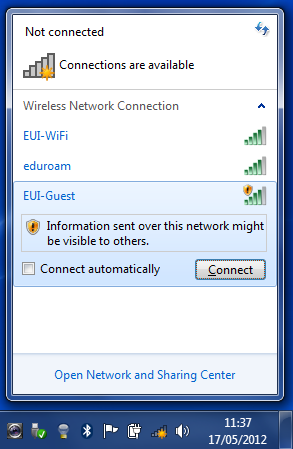
Select
EUI-Guest and click on
Connect to proceed:

Figure 2: Connecting to EUI-Guest
-
Open your default web browser at the URL
http://www.eui.eu. You will receive the following Authentication screen: authenticate with the
username and
password provided on your personal
EUI Guest Receipt:

Figure 3: EUI Authentication screen
-
Once access is granted, the yellow alert triangle will disappear from the WiFi icon in the traybar and the
Acceptable Use Policy (AUP) will be displayed inside your browser:

Figure 4: EUI-Guest connected and authenticated
You now have successfully configured Windows 7 to connect to EUI-Guest.
Your device will automatically connect to the network whenever it is in range and your wireless card is enabled and turned on.
Page last updated on 17 August 2017